Index
The Outsider's Featured Tutorials are selected from a variety of sources including the best tutorials from the impressive archive on The Xara Xone (created by Gary Priester), Guest Tutorials submitted by Xara enthusiasts and new material created by Xara.
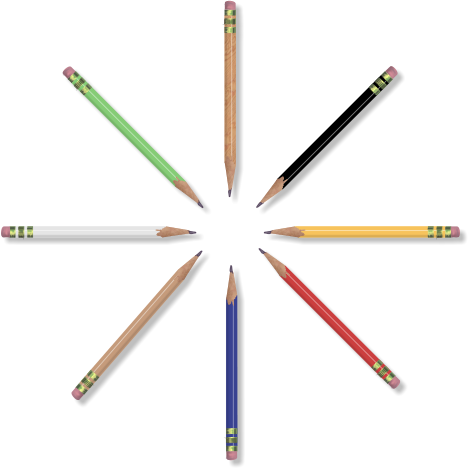
Tutorial: Creating a Pencil by Josè Campoy
Those of you who have admired Josè Campoy's work in the
TalkGraphics forums
or enjoyed his Eggs tutorial last month will be pleased to see he is sharing some more of
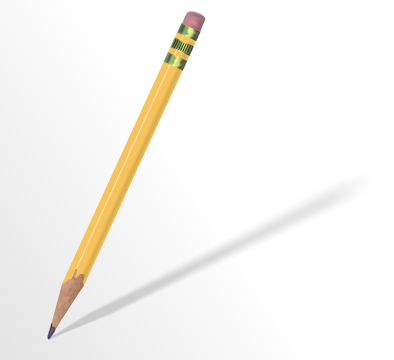
his techniques with us this month as he shows us how he created this pencil drawing usinf Xara Xtreme.
Step 1
Using the Rectangle Tool (Shift+F3) create a rectangle similar to the one shown below.

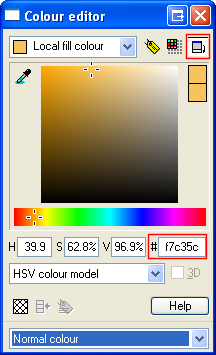
Remove the line from the rectangle by right clicking the No Color area, then click the button to its left to open the Color editor.

Click the icon in the top right to switch to advanced mode then give the rectangle a color of #f7c35c.
Right click the rectangle and select Convert to Editable Shapes. Change to the Shape Editor Tool (F4) and add an extra point to the right hand side of the rectangle. To do this, just click on the right hand side.

While still in the Shape Editor Tool, drag the new point right, and drag the existing top right corner slightly to the left. You should end with a shape something like the one shown below.

Step 2
Clone your shape (Edit > Clone or Ctrl+K or drag the original shape while holding the right mouse button, at the same time as holding Ctrl, and then left click twice where you want the copies dropped. The ctrl ensure you drag exactly horizontally, right dragging and clicking with the left mouse button drops copies wherever you drag). Change to the Selector Tool, then scale the height of the object to 10%. Be sure to unlock the aspect ratio (the padlock icon should not be selected) or the width will also be changed.

Press the Down Arrow key 5 times, then change the object's color to white (#ffffff).
Give the object a Flat transparency of 40%.

Add feathering of 2pix.
Your pencil should look like this:

Step 3
Clone the initial shape then change it in the following ways:
- Scale the height to 40%.
- Press the Up Arrow key nine times.
- Change the object's color to black
- Give it a Flat transparency of 85%.
- Apply feathering of 7 pix.

Step 4
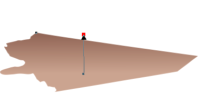
Using the Freehand and Brush Tool, create a new shape at the bottom of the initial shape. This shape will be the "wood".

Remove the outline color, then apply a linear fill making one color #caa38f and the other color #916657.
There are two ways to apply colors to your fill. The easiest is to drag a color from the Color Line on to each end of the fill line. But as you need to set a custom color, just click the end point then definite it in the Color Editor.
Scale the object then place it over the end of your pencil.


Step 5
Clone the object, and then to give it a'woodlike' look drag and drop the woodchip2.jpg fill from the Fill
gallery. Then apply a flat transparency of 75%.
Clone the object again, then drag and drop the wooden4.jpg texture on to the wood shape. Then apply a flat transparency of 75%.

Step 6
Using the Freehand and Brush Tool create a new shape under the wood. This shape will be the "graphite". Give it a color of #42314c, and remove the outline color.

Clone the graphite shape, then give it a white color and Flat transparency of 75%, and feathering of 3.7 pix.


Step 7
Create a rectangle that covers the end of the pencil. Clone the shape, then move it down the pencil. Repeat again until you have three rectangleas evenly distributed as shown below. These will form the basis of the metal of the pencil.

Step 8
Join the three rectangles (select them then select Arrange > Join Shapes).
Remove the outline color. Apply a linear fill with one color color as #7a8f61, the center
color as #f8fe8f and other color as #546248.
To apply a three-color fill, set the beginning and end colors as outlined in Step 4. To define the middle color, double click on the center of the fill line to set a new fill color point then set what color you want for this new point in the Color Editor.

Step 9
Clone the metal shape. Using the Freehand and Brush Tool make a new shape in front of the metal shape like shown.

Select the metal shapes and the new shape then select Edit > Combine Shapes > Intersect Shapes.
Remove the outline color. Apply a color of #7cac65 and feathering of 4pix to the new shape.


Step 10
Clone the shape made in step 8, then select Shift + Up Arrow to move it. Scale its width to 60%, then give it a color of #333333.

Step 11
Clone the metal shape once again, and using the Freehand and Brush Tool draw a shape in front of it.

Select the metal shapes and the new shape then select Edit > Combine Shapes > Intersect Shapes.
Apply a color of #4f5d46 and feathering of 2.5pix to the new shape.


Step 12
Clone the metal shape once again, and using the Freehand and Brush Tool draw a shape in front of it.

Select the metal shapes and the new shape then select Edit > Combine Shapes > Intersect Shapes.
Apply a color of #fcff98, feathering of 3.5pix and Flat transparency of 50% to the new shape.


Step 13
Create a thin horizontal rectangle anywhere on the page. Give it a color of #38372e.
Clone it, then scale it to 30% height. Move the new rectangle down slightly and give it a color of #94ad53.
Group the rectangles (Ctrl+G) and position the new grouped object over the middle metal piece of the pencil. Clone the shape multiple times so that it appears as follows:

Step 14
Create a new shape in the top of the pencil. This shape will be the eraser.

Remove the outline color. Apply a linear fill with one color as #b9818f, the center color as #c68591 and the other color as #93636e.

Step 15
Create two new shapes over the eraser. Remove the outline color of both. Change the color of shape 1 to #937181 and shape 2 to #d58c98. Apply feathering of 4 pix to shape 1 and 6 pix to shape 2.


Step 16
You're finished! Group the objects together (Ctrl+A to select all objects then Ctrl+G to group them) and apply a slight drop shadow using the Shadow Tool (Ctrl+F2). You can change the color as well if you wish.

©2006 Xara Group Ltd, created by Josè Campoy.
|
|

