Creating the individual frames in Xara Webster
A number of features of Xara Webster really come into their own when creating animations. For a start, because Xara Webster is an object-based illustration package, it is simple to clone a drawing and change one small portion of it without affecting the rest of the drawing. Objects can be moved easily across the screen, and co-ordinates can be entered precisely in icons on the tool bar.
With Xara Webster's superior display even in 256-color modes, its redraw speed and multiple undo, and you have an incredibly powerful animation tool.
By way of illustration, let's see how the animation at the top of this page was created, step-by-step. (The animation runs once, when the page is loaded, to avoid distracting you too much). The animation is small, simple, and uses all the relevant techniques, so it's an ideal one to use as a tutorial.
For historic reasons, this tutorial shows a gray background. If you follow the tutorial, you'll be creating the animated GIF again the usual white background.
![]()
![]() Creating a frame outline
Creating a frame outline
Create a new document. Import the rectangle from the Simple Shapes - Outline section of the Clipart Gallery. Decide what size you wanted your animated GIF to be. In this case, 190 by 45 pixels so scale the rectangle to that size. We suggest turning on grid snapping (Snap to Grid is on the Window menu) for pixel perfect alignment of the rectangle.
This provides a frame within which to place each cell of the animation. Although the frame will eventually be made completely transparent (so that the page background shows through), the black line is useful while you're designing the cells so that you can see it.
![[Frame diagram 2]](graphics/frame2.gif)
![]() Creating the first frame
Creating the first frame
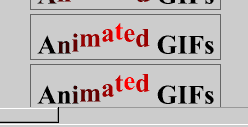
Type in the text 'Animated GIFs'. This is the first frame completed.
Note: in many circumstances it is simpler to draw the graphic first, and then fit the frame round it, so these two steps can be completed in either order.
![[Frame diagram 3]](graphics/frame3.gif)
![]() Copying the frame
Copying the frame
Although you can make a bitmap copy of the frame and then change the original, in this case you're going to copy the frame for each frame in the animation - this way, it will be easier to re-do individual fames if you need to. Therefore you need to select both the frame outline and the text, clone them (Ctrl-K), and move the clone.
This is easier than copying and pasting because you can keep track of the individual frames more easily.
By doing this several times, you end up with a sequence of (currently identical) frames, ready to be animated.

![]() Animating the other frames
Animating the other frames
Animating all the frames is a simple matter of making small changes. In this case, the letters on subsequent frames must be moved up and down again to create a wave effect, and the color changed to red and then back to black. To do this:
- Using the text tool, select the individual letter or letters.
- Move them up or down using Baseline Shift.
- Use the Color Editor to change their color.
Far more complicated effects are also possible - often easy - to achieve: you could have a scrolling star field, a scrolling message or banner, or a fade between objects using Xara Webster's transparency.
![]()
Did this page help you? If not, please email us to tell us why not so we can improve it.
![]()
© Copyright Xara Ltd:
page last updated 28 Apr 1997
For more information, contact
webmaster@xara.com.