

Dithering
Xara Webster provides three types of dithering. None means there is no dithering, Ordered uses an ordered (regular) dithering pattern and Error Diffusion uses a more complex dithering technique. In general, Error Diffusion gives the best results, but many images don't need dithering to give acceptable results. Using dithering increases file size (see the examples on this page).
Color Depth
GIFs can contain up to 256 colors but most images require far fewer colors. Reducing the number of colors makes the file size smaller and hence the GIF downloads quicker. Often you need to try a few experiments to find the minimum number of colors that's suitable for a particular image.
GIFs have three basic formats of 2 color, 16 color or 256 color. Confusingly you can create a 256 color GIF that only uses 16 colors. (Or a 16 color GIF that only uses 2 colors.) However this creates a larger file size than a true 16 color or 2 color GIF.
If you use GIF transparency, the transparency counts as one of the colors so a 16 color GIF with transparency can contain up to 15 colors.
Palettes
You can choose between using the standard Netscape/Internet Explorer browser palette or an optimized palette. An optimized palette contains a range of colors best suited for the display of this image and gives excellent results. It is particularly useful when reducing the color depth to create small file sizes. Our advice is to generally use Optimized Palette.
Add system colors
Selecting this option adds 28 colors to the palette. These colors are the normal Windows system colors and a number of primary colors. This ensures the palette includes a spread of colors and may improve the quality of the image, particularly if you use dithering. You may need to experiment with this option to get the best results.
Transparency
Without transparency, GIFs appear in the browser as a solid rectangle. Often by making parts of the GIF see-through, you produce eye catching graphics. To create see through areas, select those parts of the drawing you want to appear solid and then create the GIF with Transparency enabled. Areas not covered by selected objects are transparent in the GIF.
Note that if you create a transparent GIF file, one of the palette colors is used as the transparency. This means (for example) that a 2 color GIF contains one color and transparency.
Note that GIF transparency has a different meaning to Webster transparency. GIF transparency means that the background behind objects appears totally transparent. Webster transparency means that objects appear partly or completely transparent. Any area that has Webster transparency applied is always exported as though it was solid.
You can combine several individual GIFs into an animated GIF file. (Like the flashing
arrow next to the heading.) Creating animated GIFs is covered on another page.
![]() Animated GIFs
Animated GIFsMaking GIFs download quickly over the Internet
GIFs compress the data in the file so the complexity of
the graphic matters more than the physical size. A simple graphic
with large areas of flat color compresses very well. Complex shading
and lots of colors compress less well. These are things to consider
as you create your graphic.
You can minimize the file size when you save the graphic by:
To get rid of the gray line:
Also see Creating Smooth Bitmap Edges.
Examples of GIFs with different options
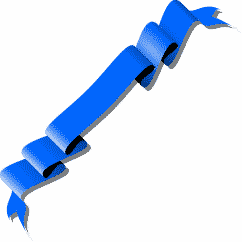
These examples use Scroll 10. The GIFs are shown half their original size.
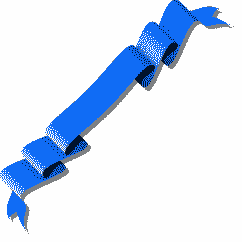 | 4 colors with dithering. Size 1.96 KB Not enough colors for this image as you can see from the white areas on the folds. |
 | 8 colors with dithering. Size 2.51 KB Better results but with some obvious color steps on the folds. |
 | 16 colors with no dithering. Size 2.75 KB Obvious banding on the folds. Worse than 8 colors with dithering. |
 | 10 colors with dithering. Size 2.77 KB Almost the same results as 16 colors with no dithering but produces a slightly larger file size. |
 | 16 colors with dithering. Size 3.22 KB Dithering doesn't give any improvement but produces a larger file size. |
 | 32 colors with no dithering. Size 4.17 KB Much better results. You can see that adding only another 16 colors gives a big improvement in appearance. |
 | 64 colors with no dithering. Size 4.77 KB Only you can decide which of 32, 64 or 128 colours gives acceptable results. |
 | 128 colors with no dithering. Size 5.30 KB The largest file size but relatively little improvement over 32 or 64 colors. |
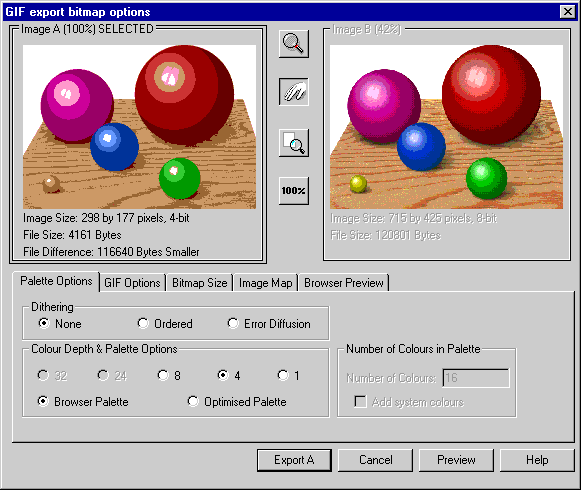
Xara Webster now includes a preview facility. When you export a bitmap the bitmap export dialog box shows you what the bitmap will look like when you save it to disc. You can change the export options, click the Preview button and see what effect your changes have.
There is also a Browser Preview. Clicking the Browser Preview button in the Browser Preview tab of the export options creates the bitmap and shows it in your web browser. you can then see exactly what it will look like on your web page.
For help on using this feature, click the Help button in the bitmap export options.
The IMG HTML command
If the IMG command includes the width and height of the graphic, the browser can load the text first and than load the graphics. This doesn't load the page faster but it lets the viewer start reading the text whilst the graphics download. It just seems quicker.
The IMG command should look like this
![]()
![]()
Related Pages
![]()
© Copyright Xara Ltd:
page last updated 20 Aug 1997
For more information, contact
webmaster@xara.com.