|
For
the time-pressed web designer, Webstyle is simply the fastest available
method of creating top quality, web optimized graphics. And there's
no artistic skill required!
The
concept is simple; you can customize Webstyle's professionally designed
templates - and because these templates are vector graphics you can
edit them without any loss of quality.
The
way in which you create your final graphics is the same easy 4 step
process, whatever sort of graphic you require:
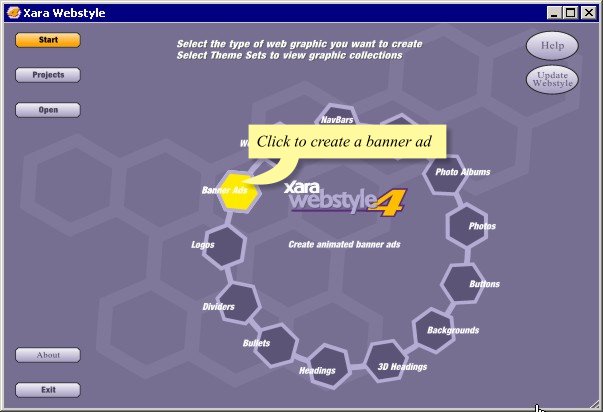
Firstly
you choose the sort of graphic you want to create by clicking on one
of these graphic types. We're going to use a banner ad for this example.
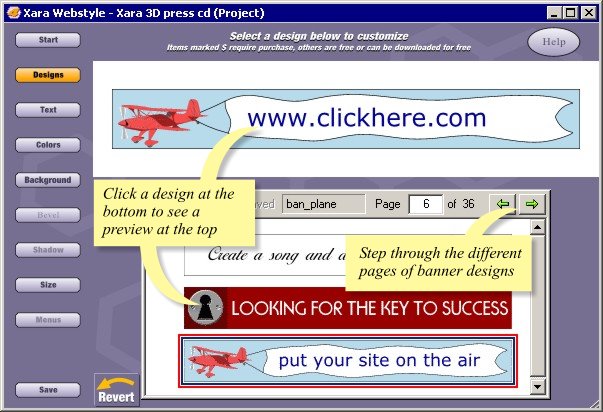
Secondly you
select your design from the Webstyle templates. Use the arrows at the
top, right hand side to browse through all of the designs. Once you
find a design you like, simply click to select it. The chosen design
will appear in the preview window.
The
next step is to customize your graphic to make it just right for your
own site - the text, color, size and so on. You can do this by clicking
the buttons down the left hand side which will open the editing dialogs.
As you make changes the image will be instantly updated in the preview
window.
For
example if you want to change the text you click the Text button
which opens the text editing dialog. Then from the drop down menu, select
the line of text you wish to change...and type in your own advertising
copy. Do the same for each line of text you wish to change.

You
can change the font as well by simply selecting the text line you
wish to change, and choosing a new font. Notice that all changes to
the banner are reflected instantly in the preview window.
The
Advanced Text Dialog gives complete control over the position of the
text, tracking, line spacing and aspect ratio.
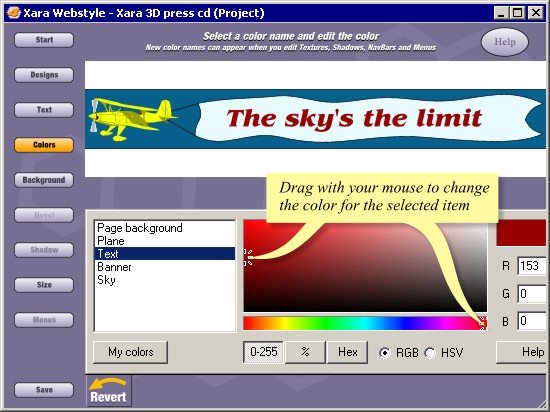
Changing
the colors is just as easy. Click the Colors button. All the color elements of the design are
shown here, simply select the one you want and click the new color.
The My colors option allows you to select from a range of colors already
used in your site.
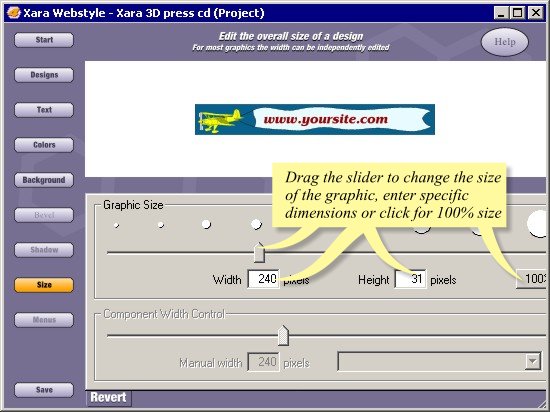
To
give another example, if you want to change the size, then click the
Size button and simply adjust the slider or set the size of
your graphic in pixels. You can scale down the whole
graphic if you'd like a smaller size.... 100% takes you back to the
original size. And remember, there will be absolutely no loss of quality
when you rescale these graphics because the templates are in vector
format.
The
final step is to export your graphic. Select Save; you'll find
a dialog that displays the size of your graphic in pixels and K. You
can optimize the graphic by choosing the number of colors and whether
to dither or not - it's basically a trade off between file size and
image quality. Since this is a banner we'll go for 16 colors, no dithering.
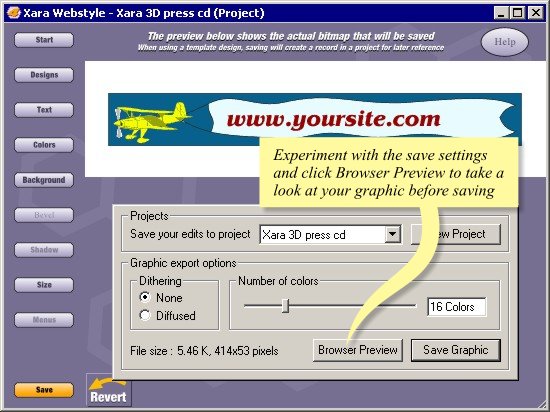
Notice that it's
interactive and instant - the size figures and the image update as
you alter the settings. And that means no more trial and error!
Optimizing
web graphics can be a rather complex process. As you'd expect, Webstyle does the work for you; it
not only produces fully anti-aliased images - in other words the best quality - but
also optimizes the file size to be as small as possible. This example
is less than 6k, which is really small for an animated banner. And
of course it saves the graphics in GIF or JPEG format so you can be
sure they will work with all browsers. Webstyle even offers direct
integration with Macromedia Dreamweaver and Microsoft FrontPage to
make exporting the graphics into these web page editors dead simple.
So
that's it, we've created our own custom banner ad, it's less than 6k and it only took
a couple of minutes. The process is very similar for all other graphic
types such as NavBars, buttons and headings.

|