|
While there are
many photo processing programs, few if any are really simple to use.
Following the Webstyle tradition we've now included the quickest, simplest
photo processing tools to enable anyone to create great looking photos
for the web.
This quick demo
will show you how you can import and enhance your own photos in Webstyle
and also how to create automatically expanding photo thumbnails.
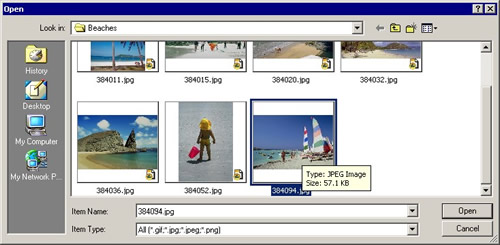
To start, Select the type of graphic you want to use, in this case Photos.

You can browse your hard drive and select your
photo.
Now you can edit
your photo by clicking the buttons down the left hand side, which will
open the editing dialogs. And as you make changes, the image will be instantly
updated in the preview window, making experimentation easy.
One of the great
features of Webstyle is what we call its ‘non destructive’
editing – what we mean is that however many times you edit and
save your photo in Webstyle, the quality of the photo won’t be
impaired – unlike practically any other photo editor!
So let me demonstrate
some of those editing features.
Once you have selected
your photo, Webstyle immediately opens the Enhance dialog.
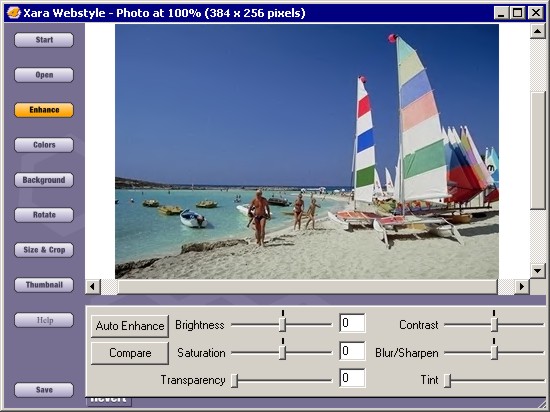
This is a poor photo,
too dark, with a lot of detail lost in the shadows. Well this can be easily fixed
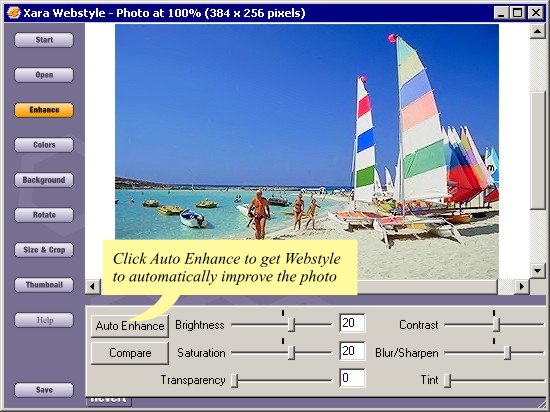
with a single click on Auto Enhance. Auto Enhance automatically adjusts
the brightness and contrast, sharpness and saturation. As you
can see that’s a dramatic improvement on the original image and
it only took a second!
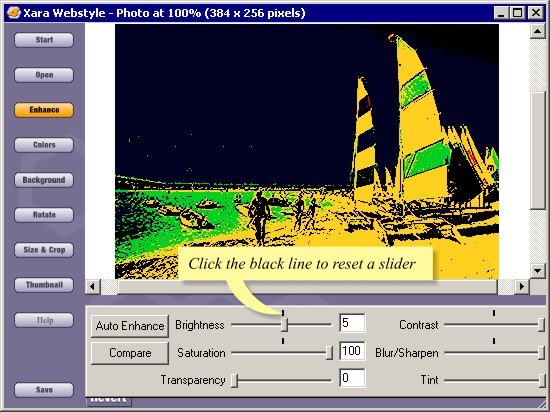
You can still tweak
the images manually be using the sliders and achieve some radical effects
by moving the sliders to their extreme limits. At any time, you can
return the settings to zero simply by clicking on the black line in
the center of the slider.
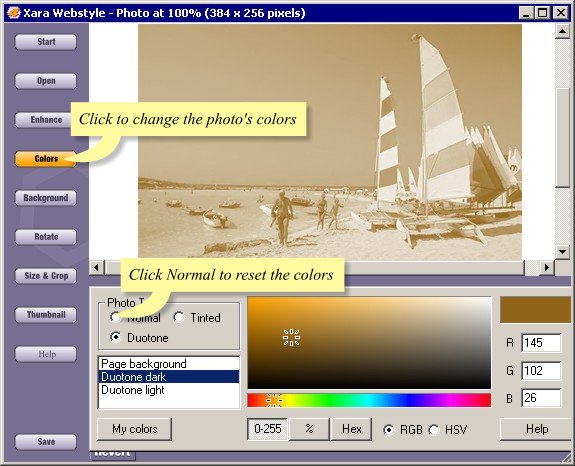
You can also change
the color of both the photo and the background. Click on the Color button
to open the Color dialog. Here, You can set the tint color, background
color and the duotone colors. So for example, if you wanted to create
a nostalgic sepia effect, first select Duotone from the list. Then select
Duotone dark, and choose the right sort of brown shade. And if you change
your mind you can always get back to the original photo simply by selecting
Normal.
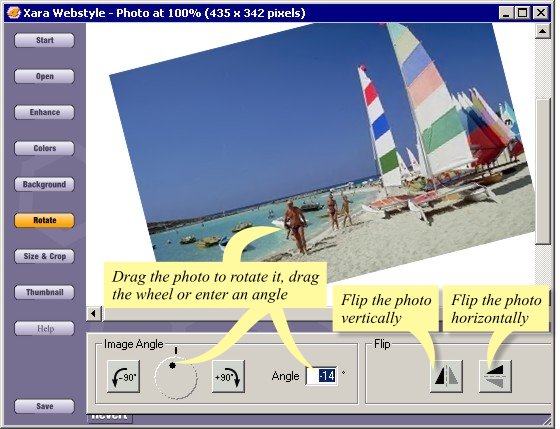
To rotate or flip
the photo, open the Rotate dialog, and then move the photo as you wish by
simply dragging on it, or using the Image Angle and Flip controls under the preview. Once
again, you can easily set it back to its original position by clicking
on the black bar above the wheel. Notice how fast Webstyle responds!
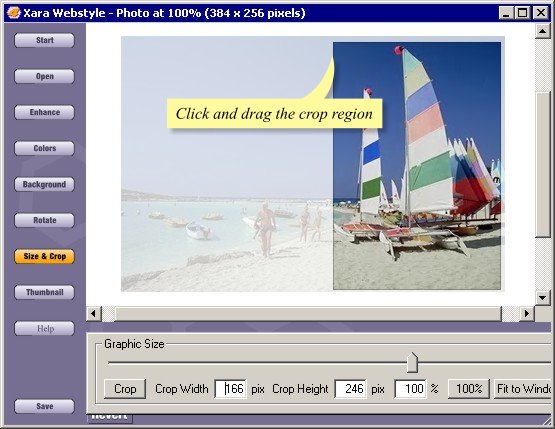
To crop a photo
open the Size & Crop dialog. Then simply drag a crop selection across
the image and just click on the Crop button. The greyed out areas will be cropped out.
You can deselect the crop by clicking away from the photo, or if you decide
you’ve got it all wrong you can click Uncrop to reverse the crop.
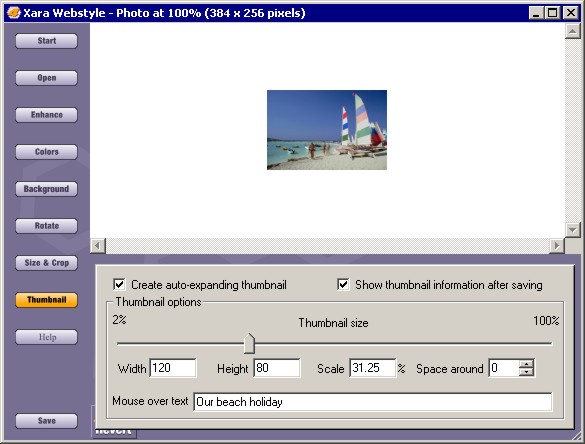
Another very handy feature of Webstyle is
the ability to create an automatically
expanding thumbnail for your photo. Large photos are a real slow down
for all web sites, and expanding thumbnails are the answer. You get
the benefit of speed from the small image but anyone can see the full
hi-res version of the photo by just clicking on the thumbnail.
Simply select the
Thumbnail button and check the 'create auto-expanding thumbnail' option. You can
alter the size of the thumb, of course and even alter the pop up text.
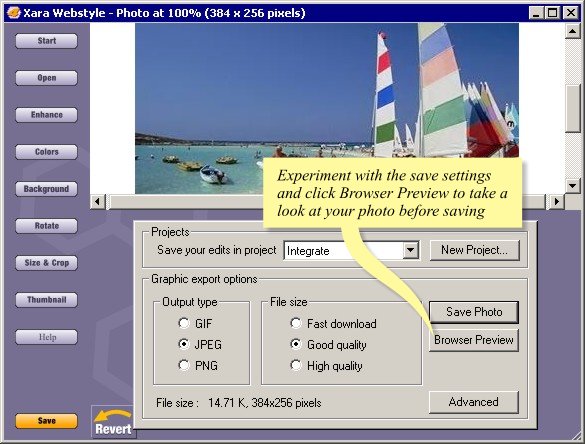
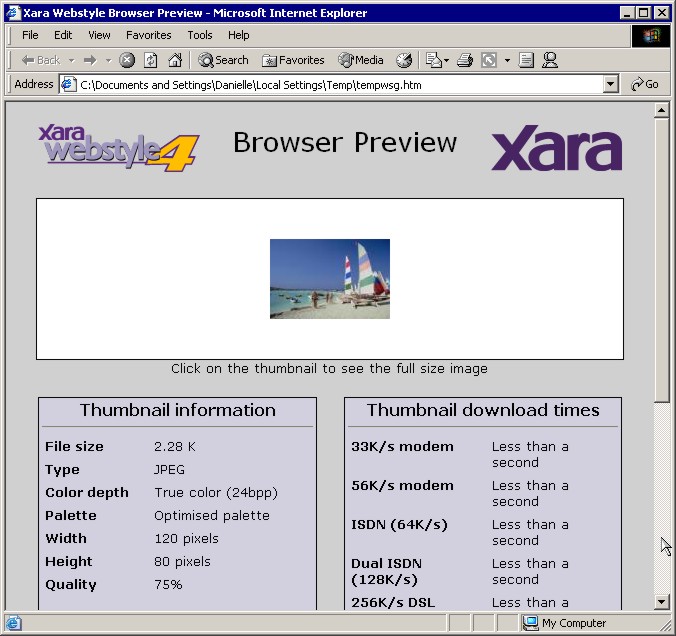
When you're ready
to save your photo, go to the Save dialog. You can preview the image
by clicking the Browser Preview button. Webstyle creates both large
and small images as well as the JavaScript required to handle the pop
up window.
|

